17 Awesome DIYs For Your New Home!
DIYs my friend! So strap on those weekend worrier boots and get yourself down to your neighborhood Home Depot and get to that list of do-it-yourself projects. Oh and check out these 17 awesome DIYs for your new home, just incase you find something else you need to do! Hugs and high-five to all you go getters!
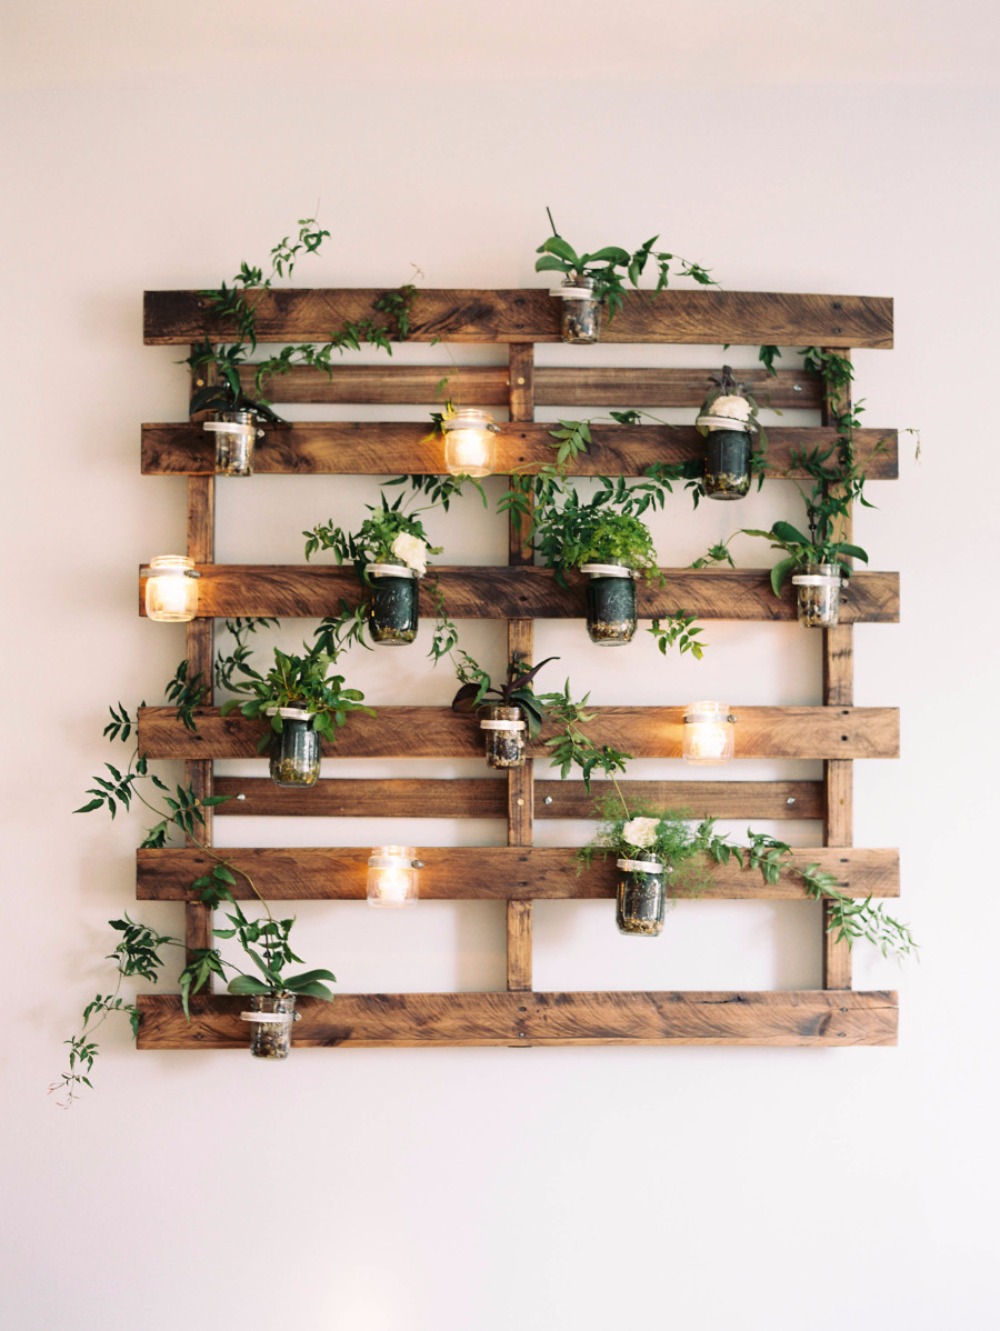
Living Wall
Shipping pallet - (ask Home depot to purchase one of the pallets their products are shipped on) | Metal strapping with holes - Home Depot $8.70 | Mason jars (14) - Walmart 12 for $6.31 | Wood stain - Walmart half pint $5.38 | Assorted potted herbs - depends on what you plant | Potting soil - Walmart, Miracle Grow 8 qt bag $427 | Tea lights - yummicandles.com 50 for $4
Step 1:
Sand down and remove excess staples and nails from pallet, remove any rotten or broken boards, dust off and stain pallet.
Step 2:
Layout how you want your jars to sit on the pallet. Measure and cut the metal strapping so that it fits snugly around jars. Screw metal strapping onto newly stained pallet in the location you would like each of your mason jars.
Step 3:
Fill several mason jars with potting soil and plant your one of your plant in each. the remaining jars will be filled with a tea light.
Step 4:
Hang your living wall in a location with plenty of sunlight. Place your mason jars filled with your plants or tea lights into each metal strap. Water, light and enjoy!
Photo credit: Abby Jiu Photography
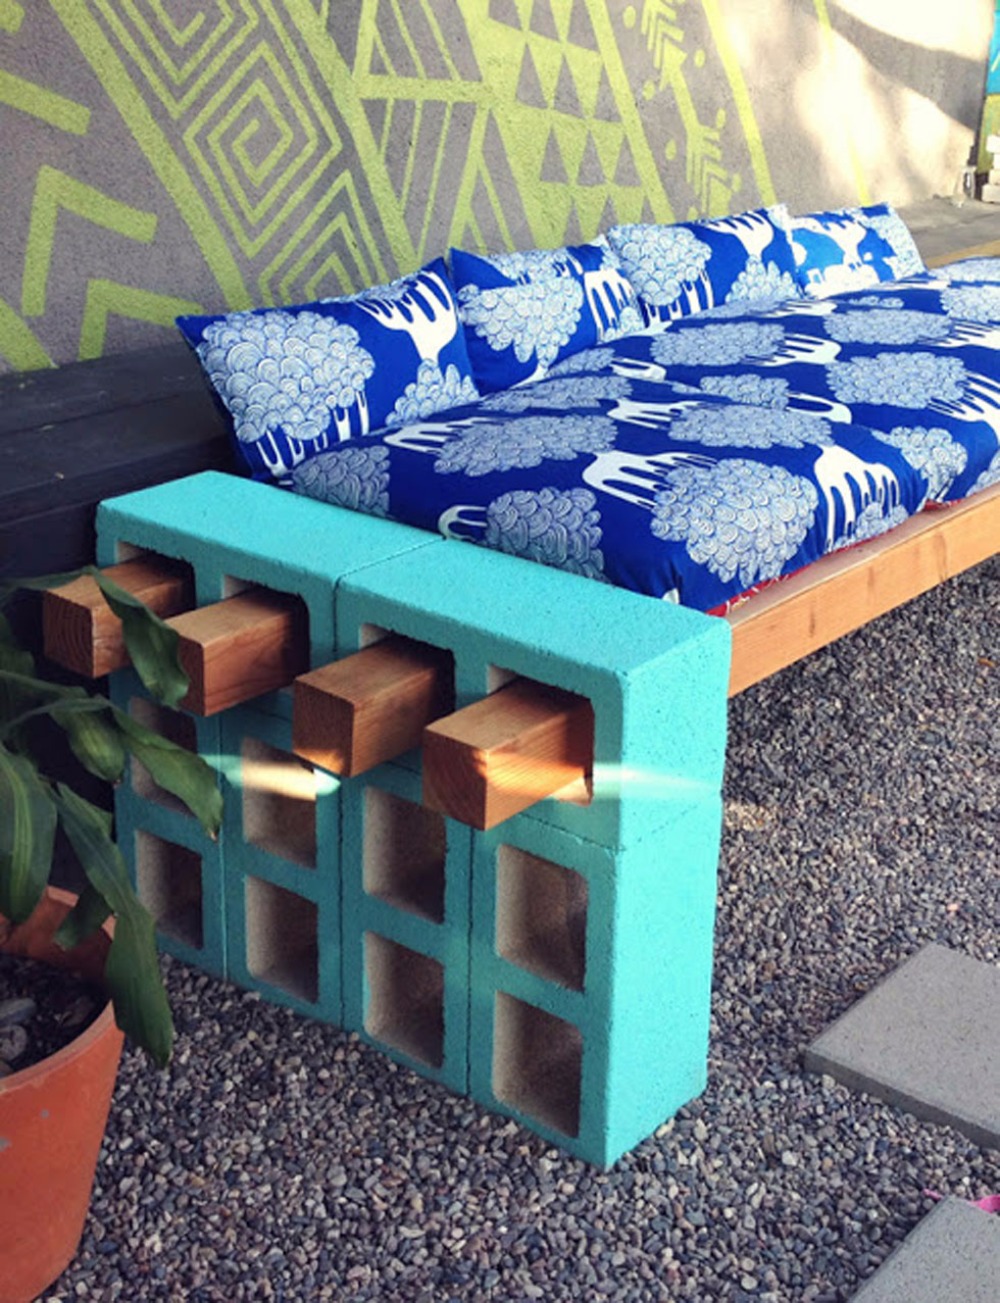
Outdoor Bench
Cinder Blocks - Home Depot (12) $1.95/block | 4in x 4in x 10ft lumber - Home Depot (4) $17.37/beam | Outdoor cushions - The Company Story (2) $23.97 … on clearance at the end of the season | Concrete adhesive - Home Depot $5.75 | Outdoor latex paint - Home Depot 32 oz for $8.46
Tip:
Make sure the ground is level before setting everything in place.
Step 1:
Start with one side. Set 4 cinderblocks vertically, and 2 that go on top horizontally. Allow approximately 8 - 9 ft. of distance before setting the next side of cinderblocks.
Step 2:
Feed the wood through one side to the other. Make sure you have at least 6 inches sticking out on both sides. If you want smaller seating, you may always trim the excess wood.
Step 3:
Once you are happy with the placement and size of the seating, temporarily remove the wood beams. Use the concrete adhesive to set the cinderblocks in place.
Step 4:
After the concrete adhesive has dried, feed the wood beams through the top holes of the cinderblocks. We decided to paint the blocks to give it a bit of color.
found on Lena Sekine’s blog, Simple living. click here to see more of this simple DIY bench.
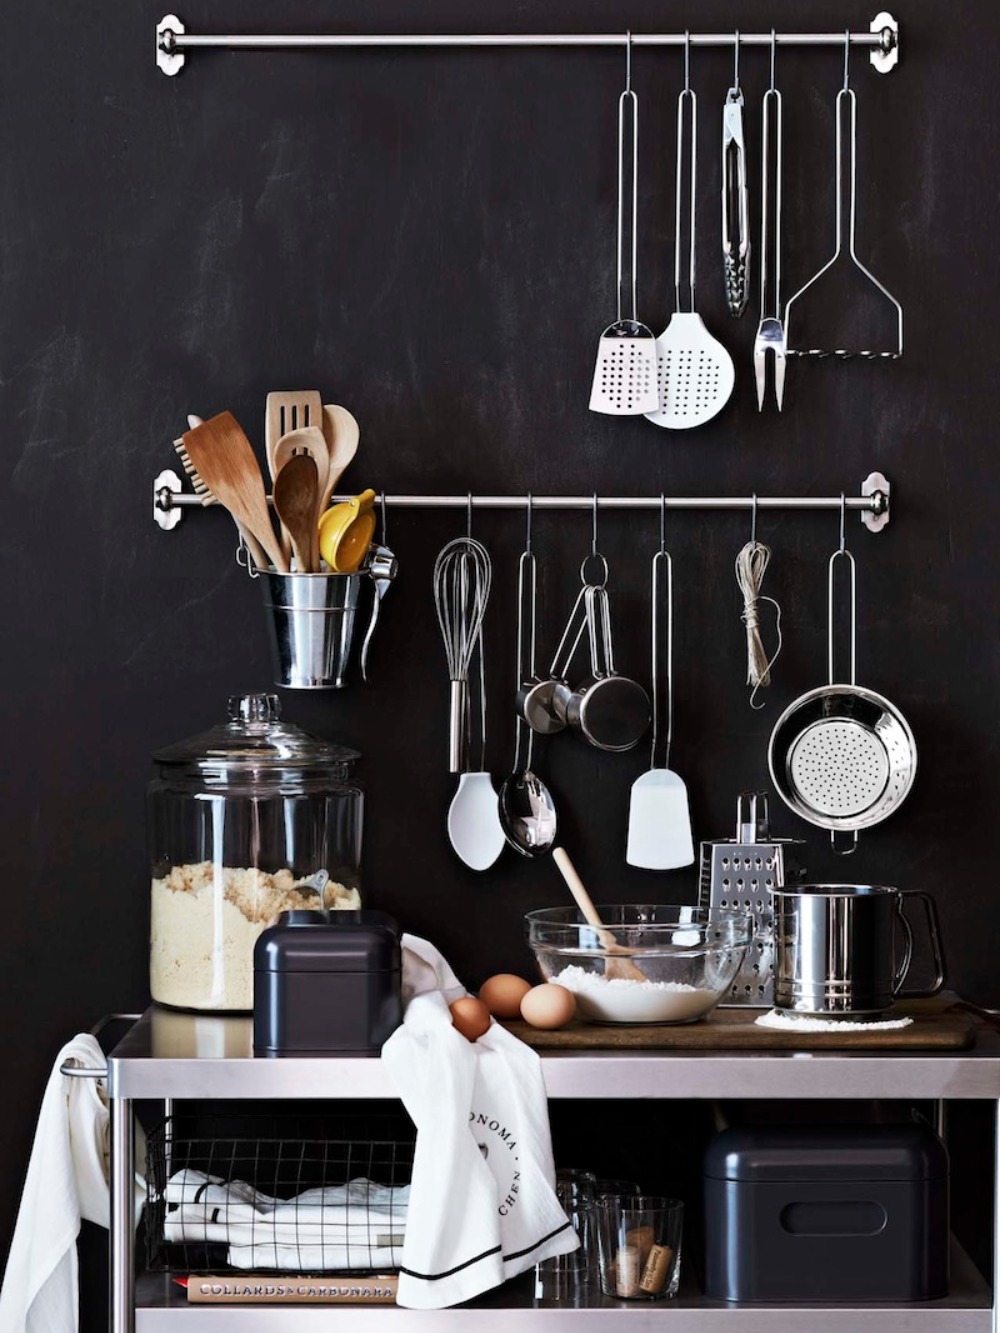
Hanging Kitchen Utensils
Single rod towel bars - Depends on the look and style you want | S hooks - purchase size that fits easily around towel bar | Level | Measuring tape
Step 1:
Measure out where you would like to install your towel bars. Be sure they are level or all of your utensils will migrate to one side.
Step 2:
Using instructions for your towel bars install each bar where you have measured and mark.
Step 3:
Simply hang S hooks onto towel bar where you would like each of your utensils to hang. place shiny new utensils on your shiny new kitchen utensil hanger.
Want more ideas like this one, Check out our 10 tips to creating a home for two here.
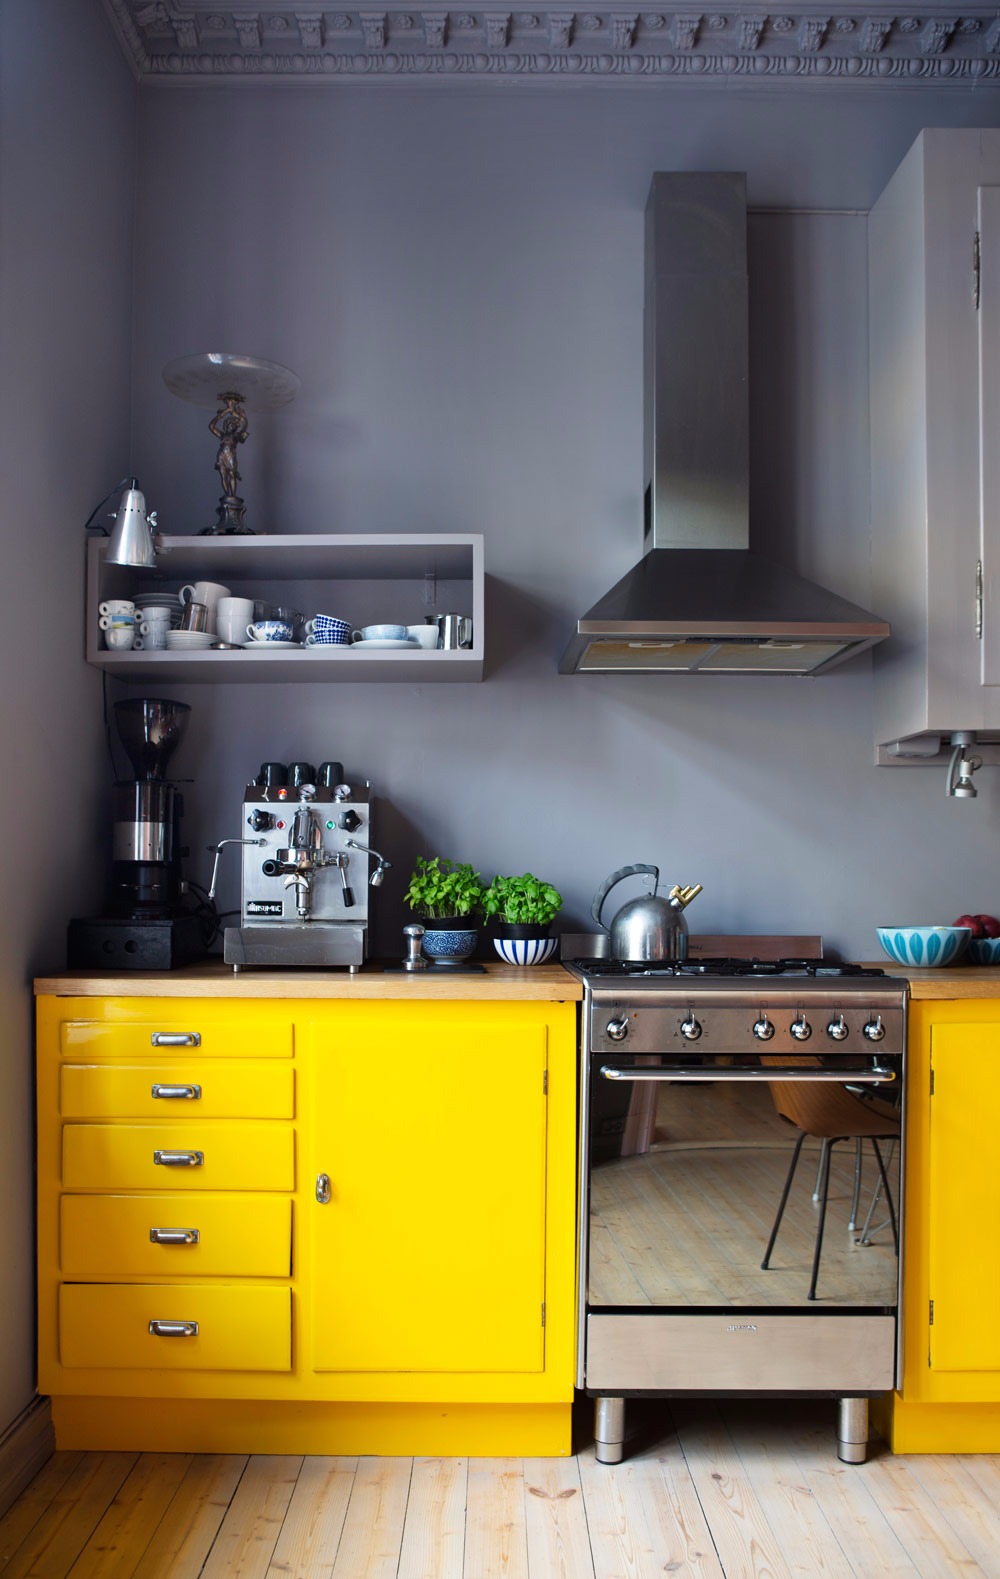
Brighten Up A Dark Kitchen
Fun and bright paint color - Home Depot Behr 1 gal indoor paint $28.48 | Painters tape - Home Depot $3.48 | Screw driver or drill to unscrew hardware
Step 1:
Prep your cabinets by unscrewing all hardware and potentially removing doors and drawers to be painted separately and then reinstalled. (the fewer things you have to work around while painting the better and faster the process) scrub off any residue that may be on the surface.
Step 2:
tape off any areas you do not want paint. under countertops, floor lines along appliances. paint has a way of getting anywhere you don’t want it during projects.
Step 3:
Find a nice long podcast or good spotify channel and get to painting. It will take much longer then might expect it to, so be patient. Once finished give it a day to dry before reattaching hardware and cabinet doors.
Step 4:
Reassemble your kitchen and get to cooking in your newly brightened up space!
Found on Apartment Therapy and credited to Shöna hem
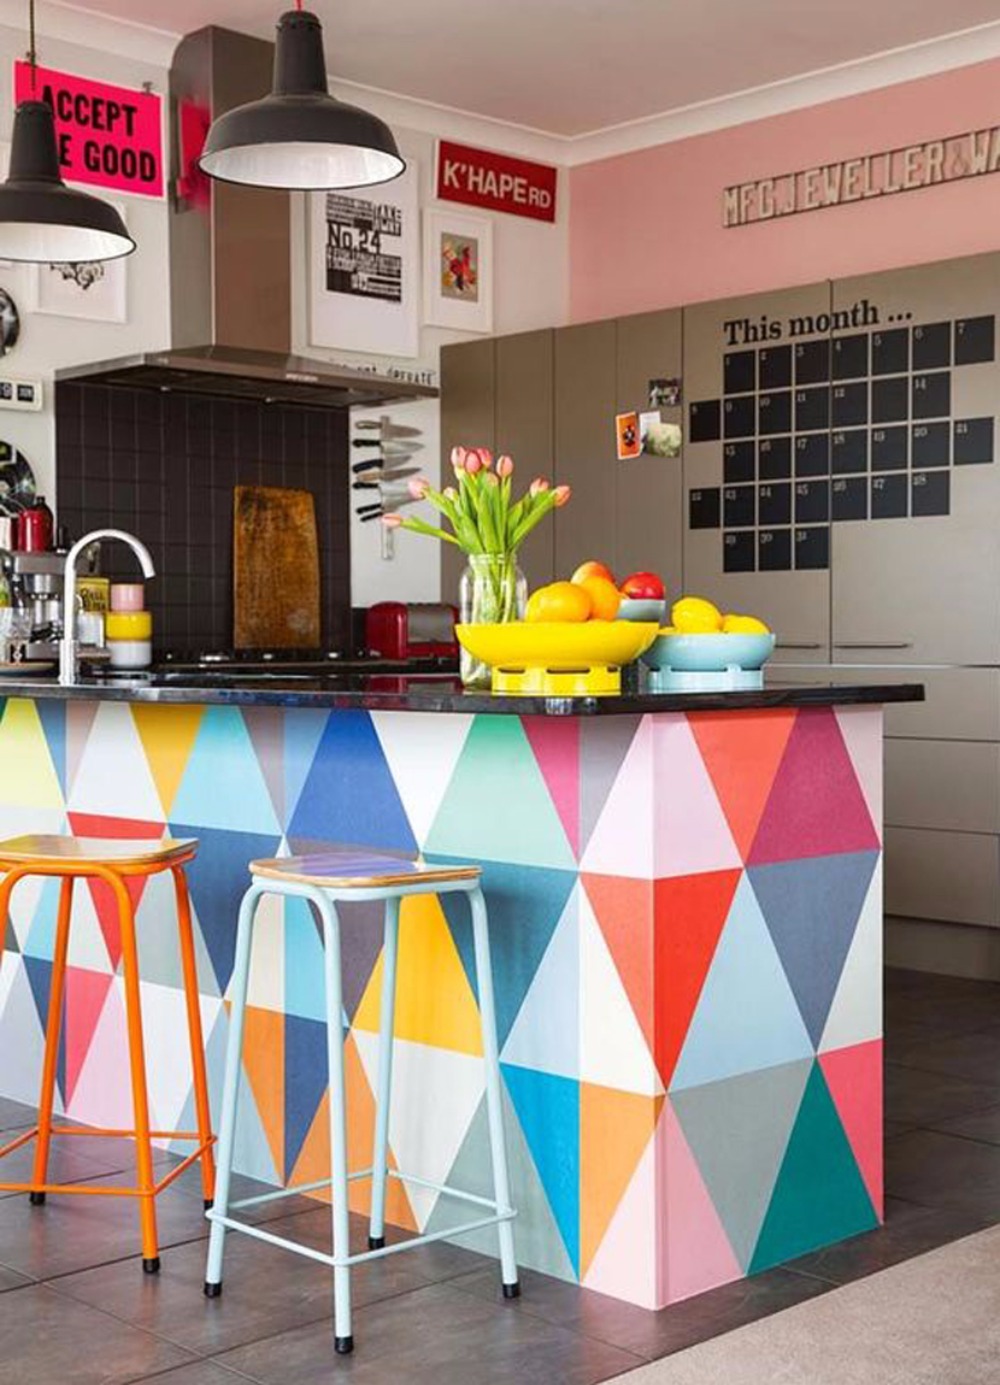
Wallpapered Island
Wallpaper of your choice - this paper was found on Minakani Lab | Paint primer - Home Depot 1 qt for $11.97
Step 1:
Prep your island or wall, whatever it is you are about to wrap in your fabulous and fun new paper. clean off any excess dust, crumbs, etc. paint your island/wall with a fresh coat of primer and let it dry completely.
Step 2:
Carefully layout your wallpaper in sections so that you know what piece needs to go where. Start installing in a top corner and work your way to the floor, slowly sticking the paper down and smoothing it out to avoid wrinkles and bubbles.
Step 3:
Once completed step back and give yourself a pat on the back, wallpaper is a tough mother to install and you just rocked it!
Found on Apartment Therapy
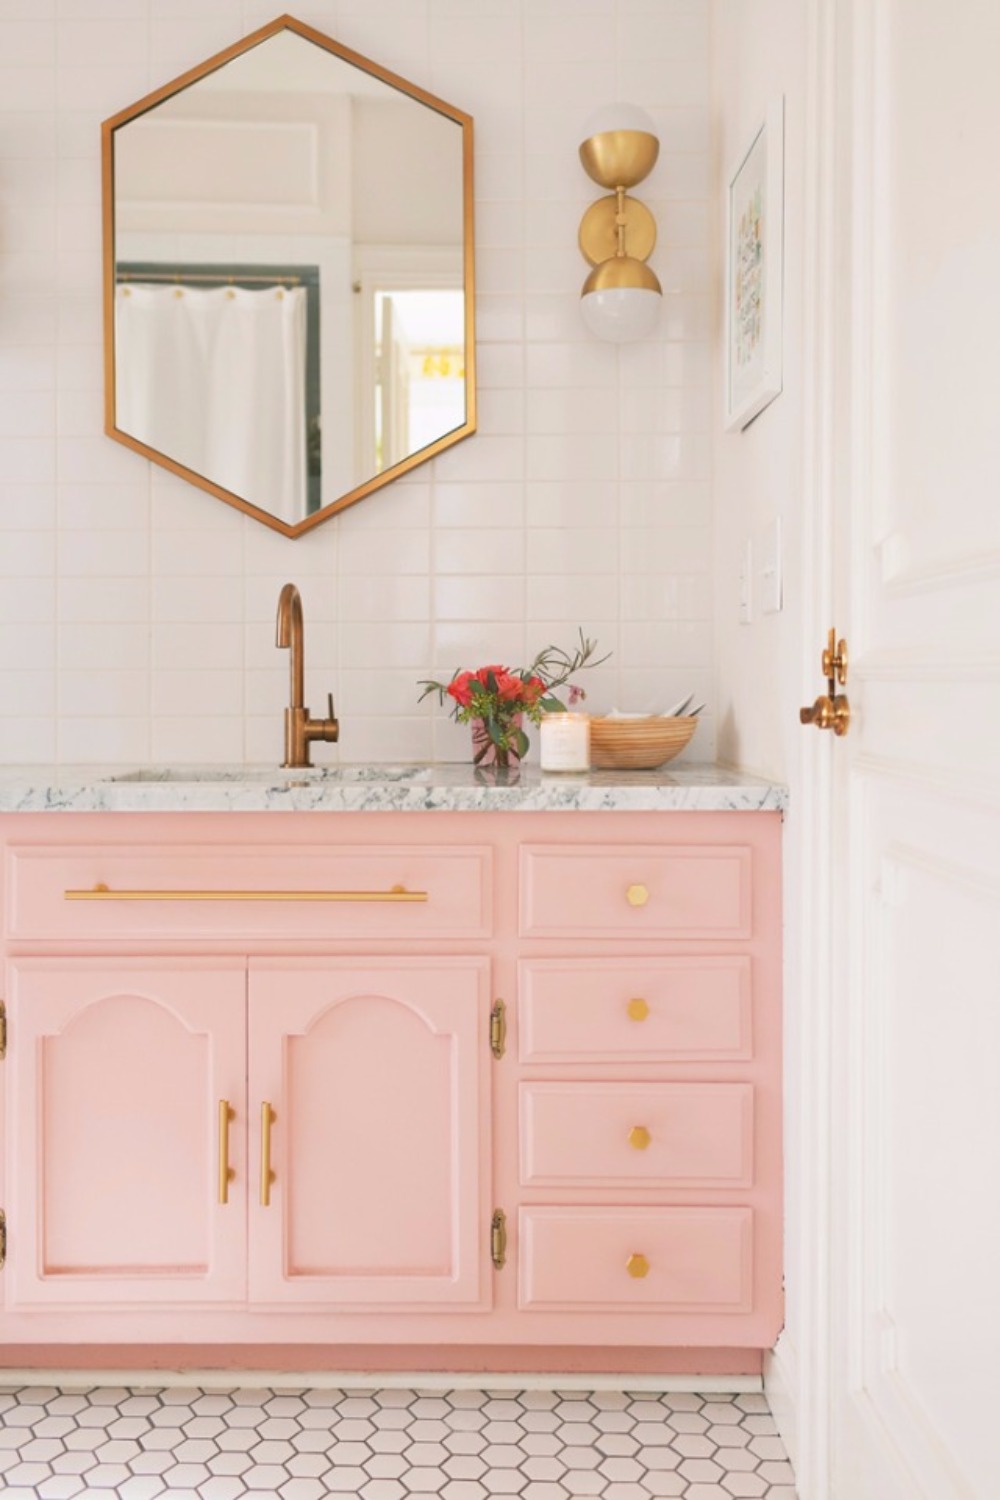
We LOVE this bathroom!!! in fact we love it so much we have every last detail and where to find them all put together in this post (Vanity Insanity! Learn How To Remodel Your Guest Bath) Check it out for the full scoop!
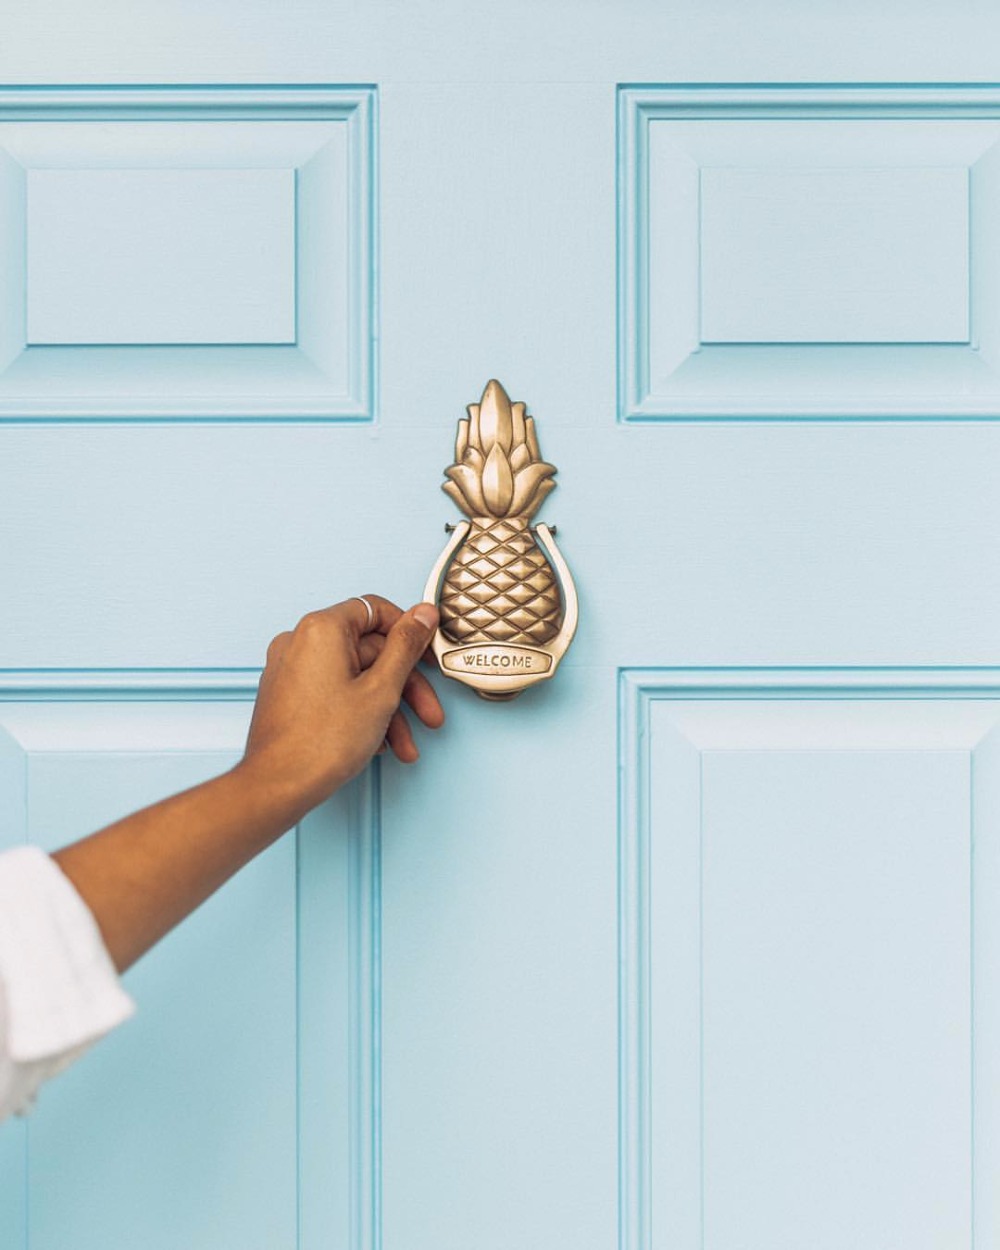
Fun & Funky Door Knocker
Door Knocker of your choice - we recommend checking out your local art fairs or try and find something uniquely you on Etsy! sorry we had no luck in tracking this super cute pineapple knocker down. | Paint - Home Depot 32 oz for $8.46
Step 1:
Once you have found THE KNOCKER for you, prep your front door so that it looks as fresh and fun as its new accessory. We recommend a fresh coat of paint to brighten it up.
Step 2:
Once painted and or prepped, measure where you would like your knocker to be placed. make sure it fits nicely on your door in a place that is easy to access. Attach door knocker with included instructions. Step back and admire your handy work.
Found on the travel integral page @elanaloo
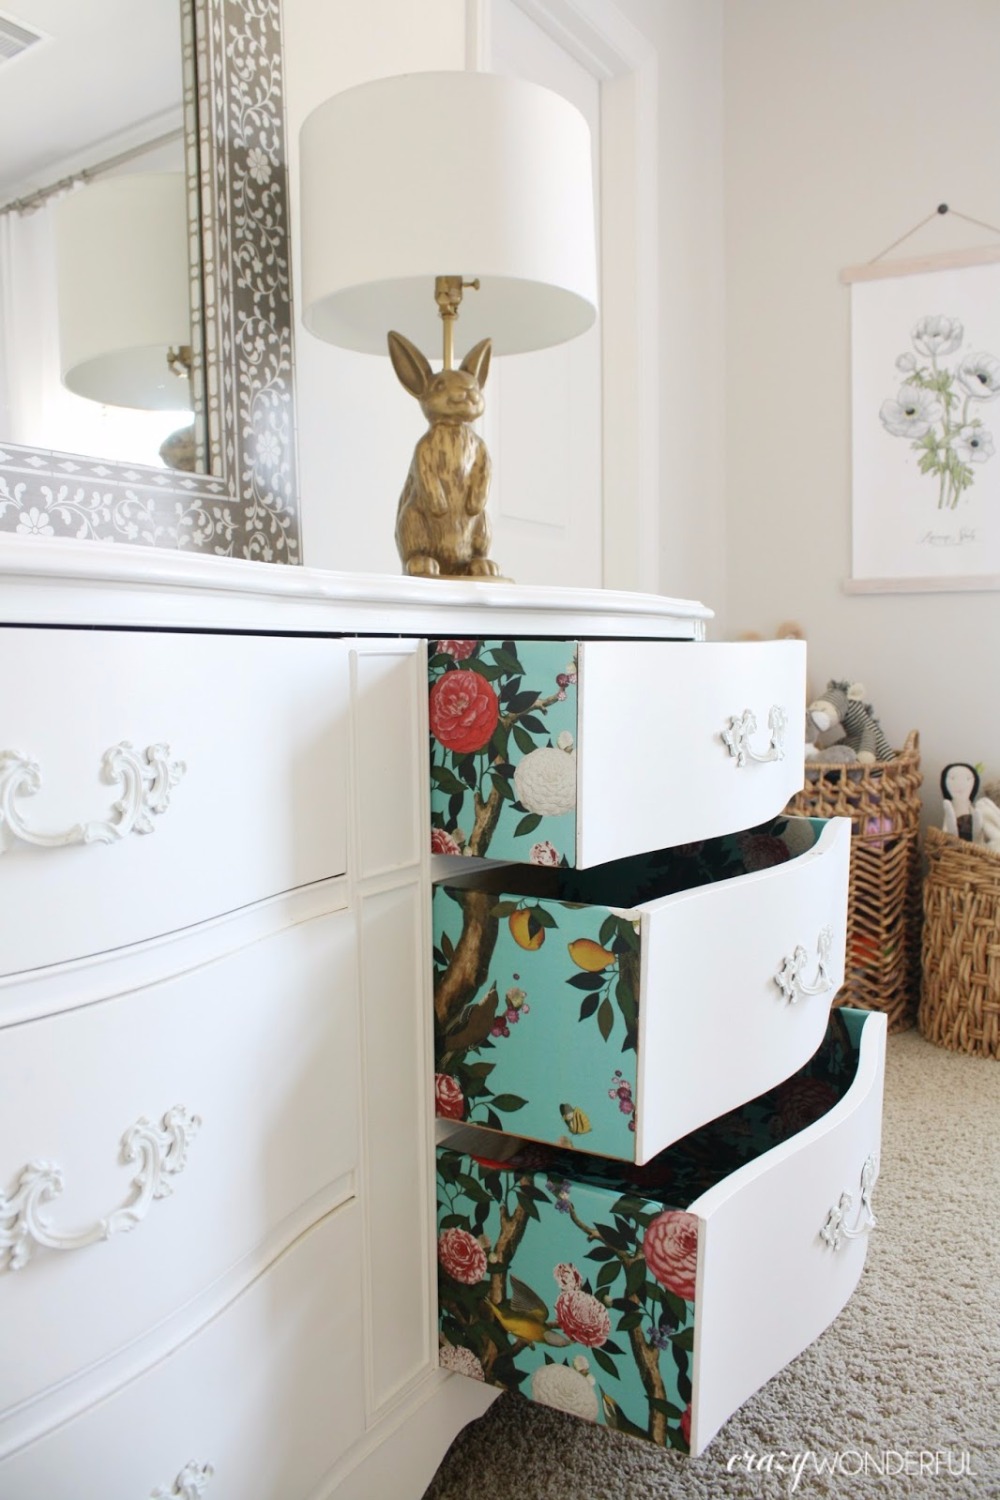
Wallpaper Drawers
Wallpaper - Milton & King Garden Bloom in Teal $148.00/roll | Wallpaper paste - Home Depot (paste) 1 qt $6.78 | Wallpaper brush - Walmart (brush) $4.49 | Sponge | Bowl of water | Tape measure | Pencil | Scissors
Step 1:
Measure your drawer width and depth. Add two inches to the width so the paper goes up the sides of the drawer one inch on each side. TIP: If your drawer has a curved front like mine, you can make a template out of newspaper or wrapping paper. Cut out the bottom piece based off these measurements.
Step 2:
Measure your drawers side panels from the bottom of the outside, up and over the lip, and down to where the panel meets the bottom of the drawer. Now measure the depth of the drawer. You will use one continuous piece of paper to wrap up the outside of the drawer panel and then down the inside of the panel. Cut out two side panel pieces, one for each side of the drawer, based on these measurements.
Step 3:Use a brush to brush on a thin layer of paste to the bottom on the drawer and a couple inches up the left and right sides. Place your paper, smooth flat and wipe away any excess paste with a wet sponge.
Step 4:
Brush a thin layer of paste onto the outside, inside, and lip of the side panel. Place your paper starting at the bottom of the outside. Wrap up, over and then down to meet the paper on the bottom of the drawer. Smooth flat and wipe away any excess paste with a wet sponge. Repeat for the other side panel.
Step 5:Let the paper dry before placing it back into the dresser to avoid any tears.
Found on Crazy Wonderful
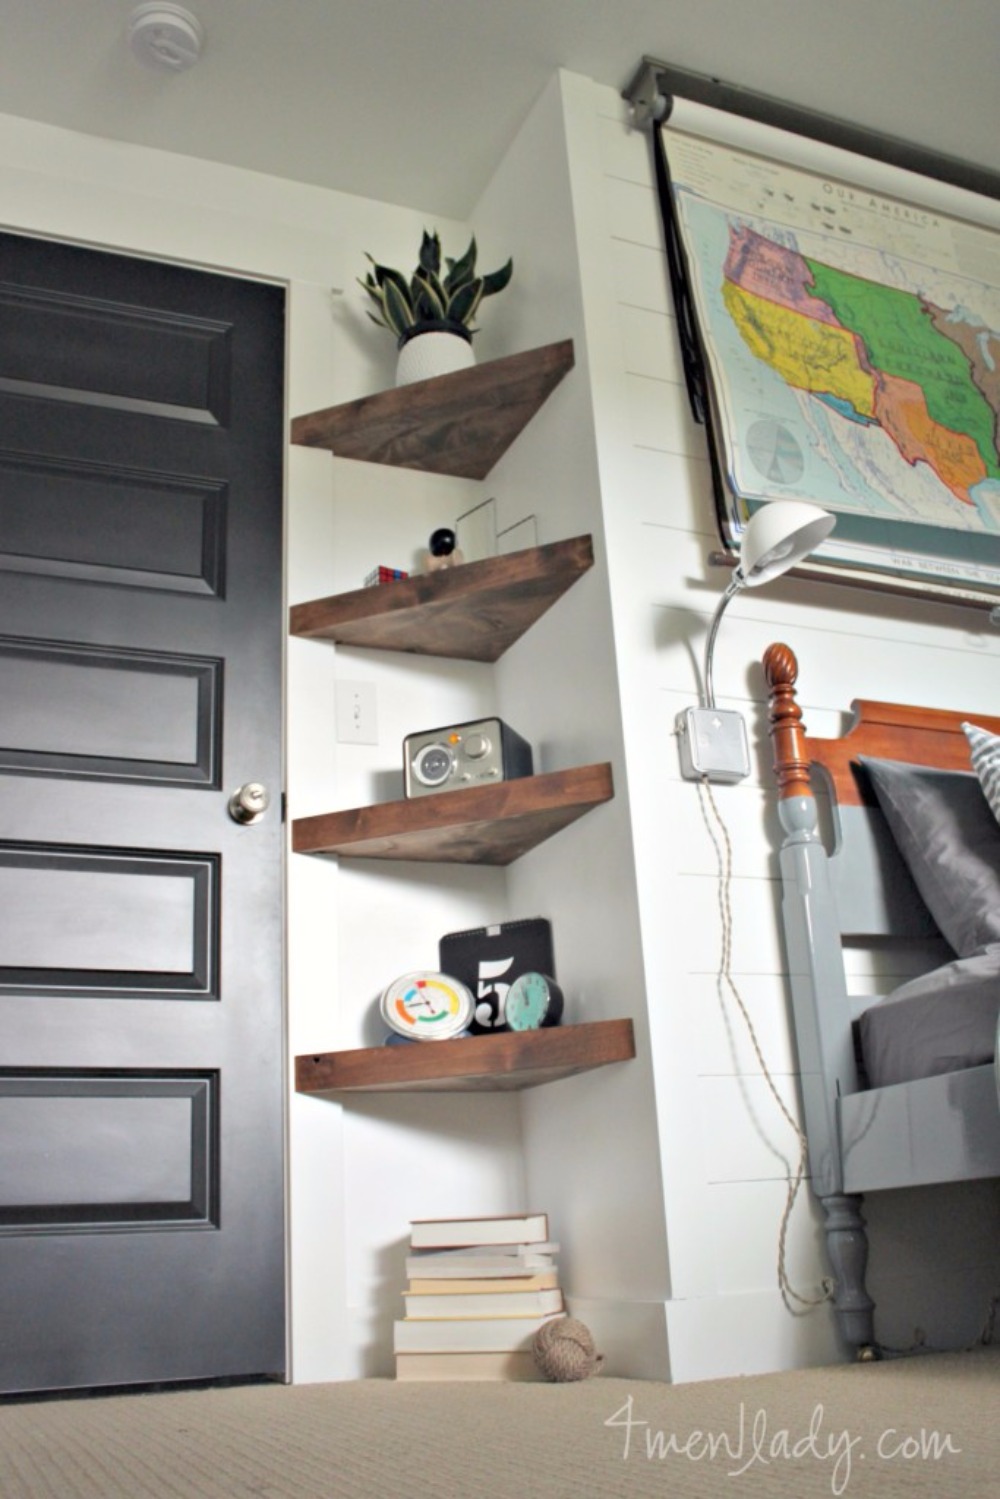
Floating Corner Shelves
For the full step by step instructions including photos of each step, which as a visual learner I find extremely helpful, check out the full write up at 4 Men 1 Lady. It is well work the click.
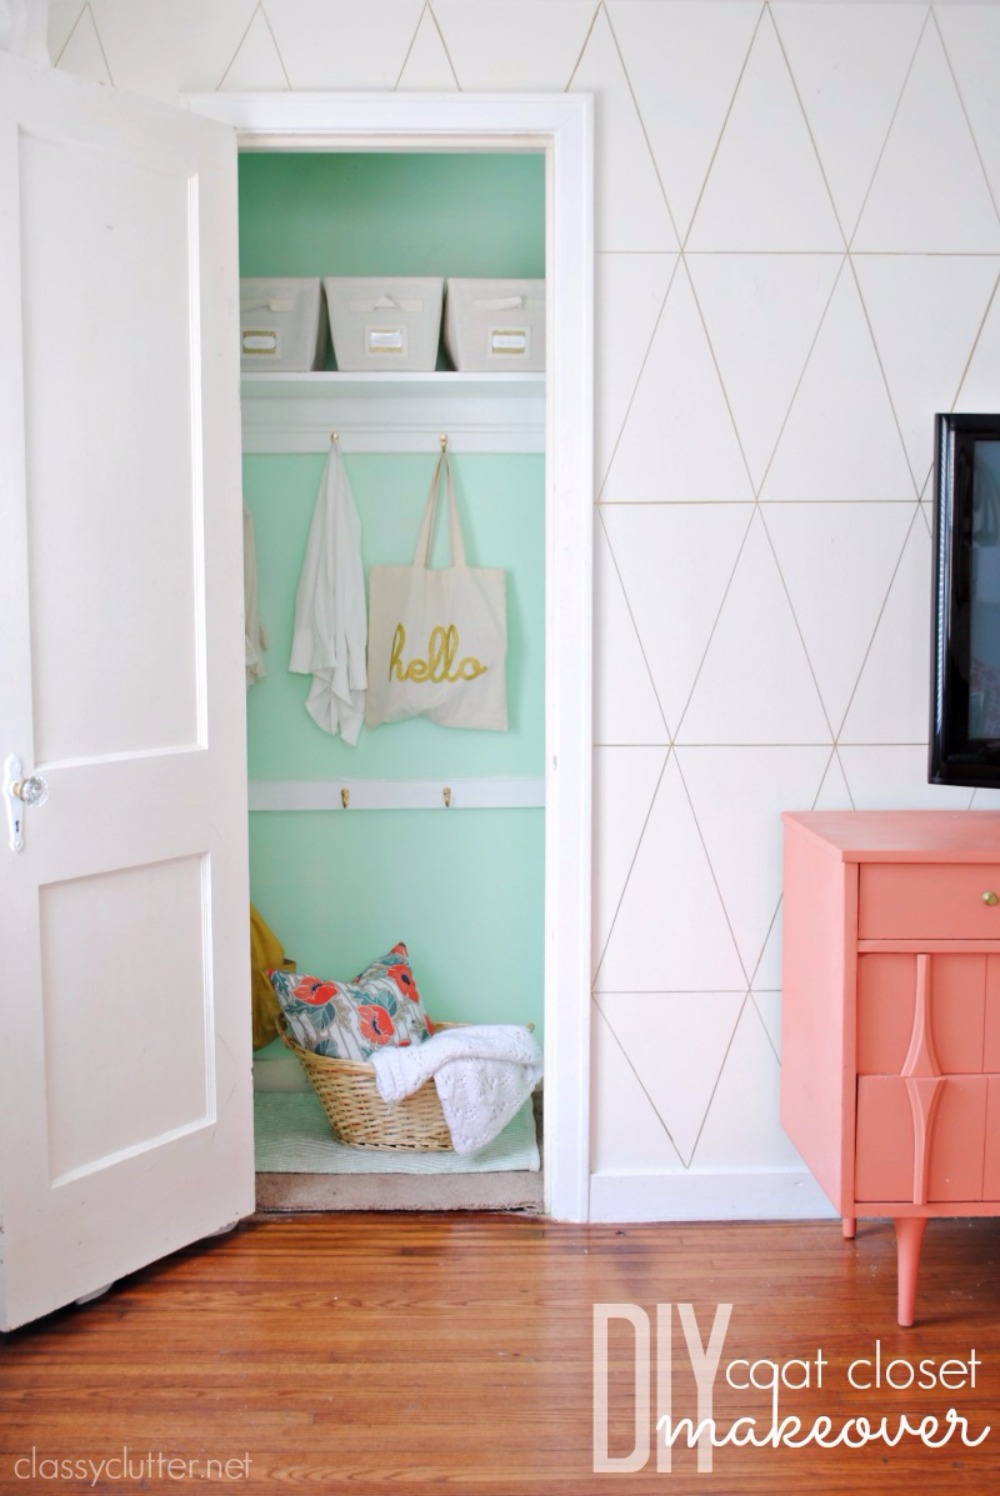
Brighten Up A Closet
Fun and bright paint color - Home Depot Behr 1 gal indoor paint $28.48
Step 1:
Empty that closet! Thats right take it all out, and while its out in the harsh light of day, you might think about thinning the herd a little. This way you know you will be able to enjoy the fresh coat of paint you about to lather onto that hidden cubby.
Step 2:
Crack open that new paint and get to painting! This is by far the best part and the most satisfying. Seeing a humdrum space turned into a fun and eye catching spot cannot be beat!
Step 3:
Let it dry, you want to give it plenty of time to cure especially if it is your cloths closet, you really love that new color but not if it happens to hitch a ride on your favorite sweater and that dress you can’t wait to wear to that thing! Once you are sure it is dry load up your newly refreshed closet and enjoy!
Found at Classy Clutter
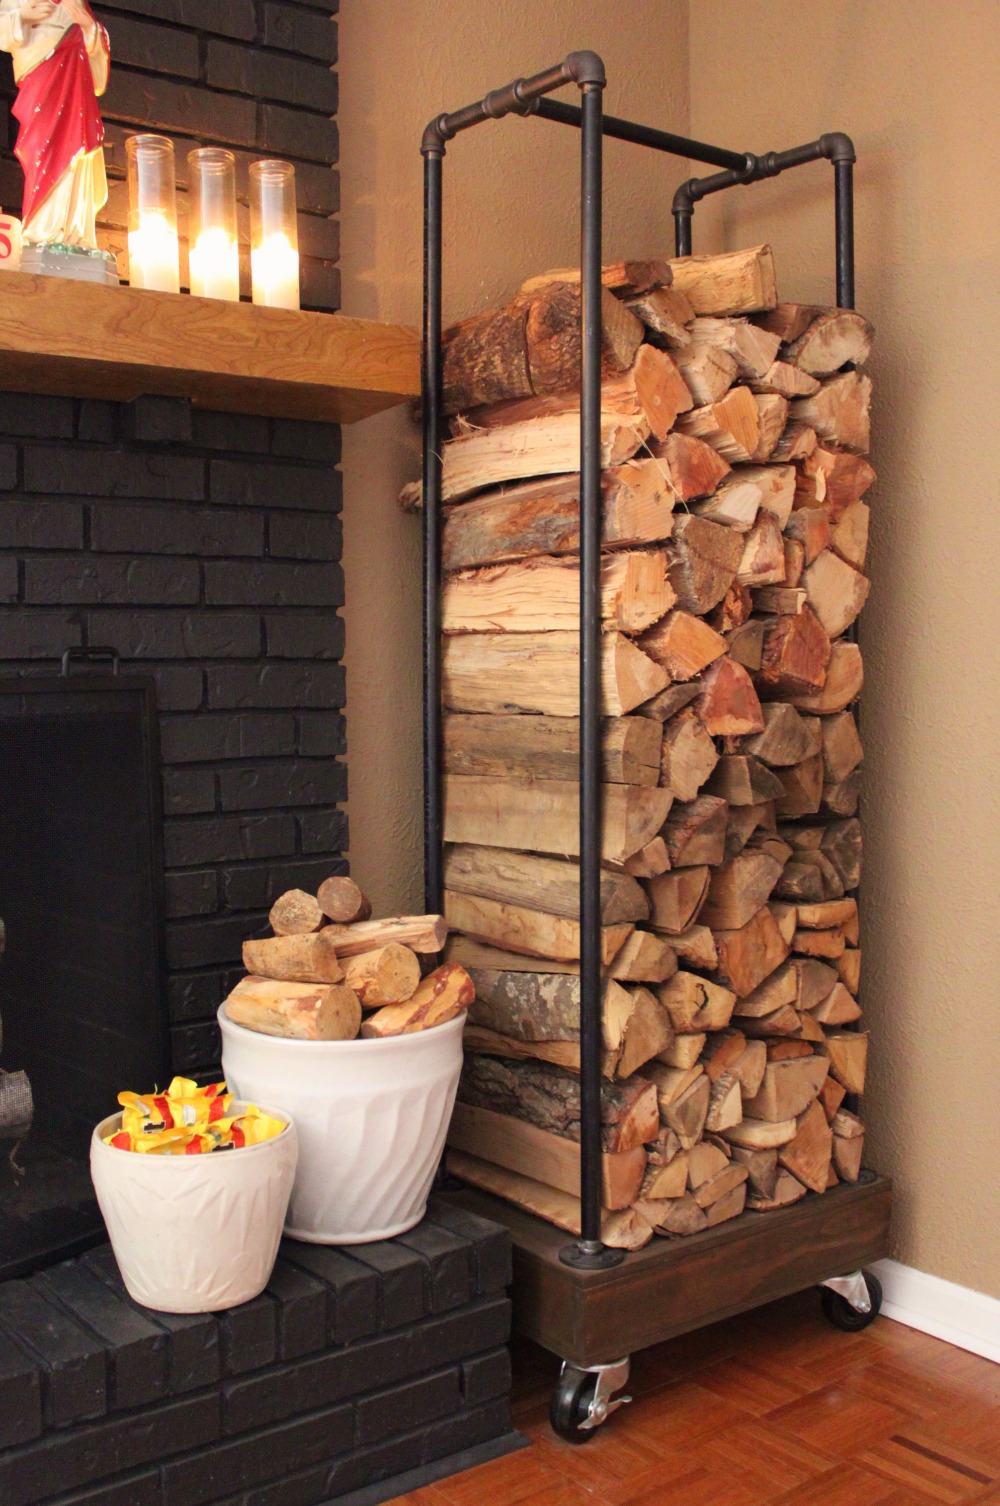
Industrial Stacked Firewood box
to see the step by step instructions on how this little industrial gem was made we highly recommend checking out The Cavender Diary! There are picture… PICTURES!!! need we say more!
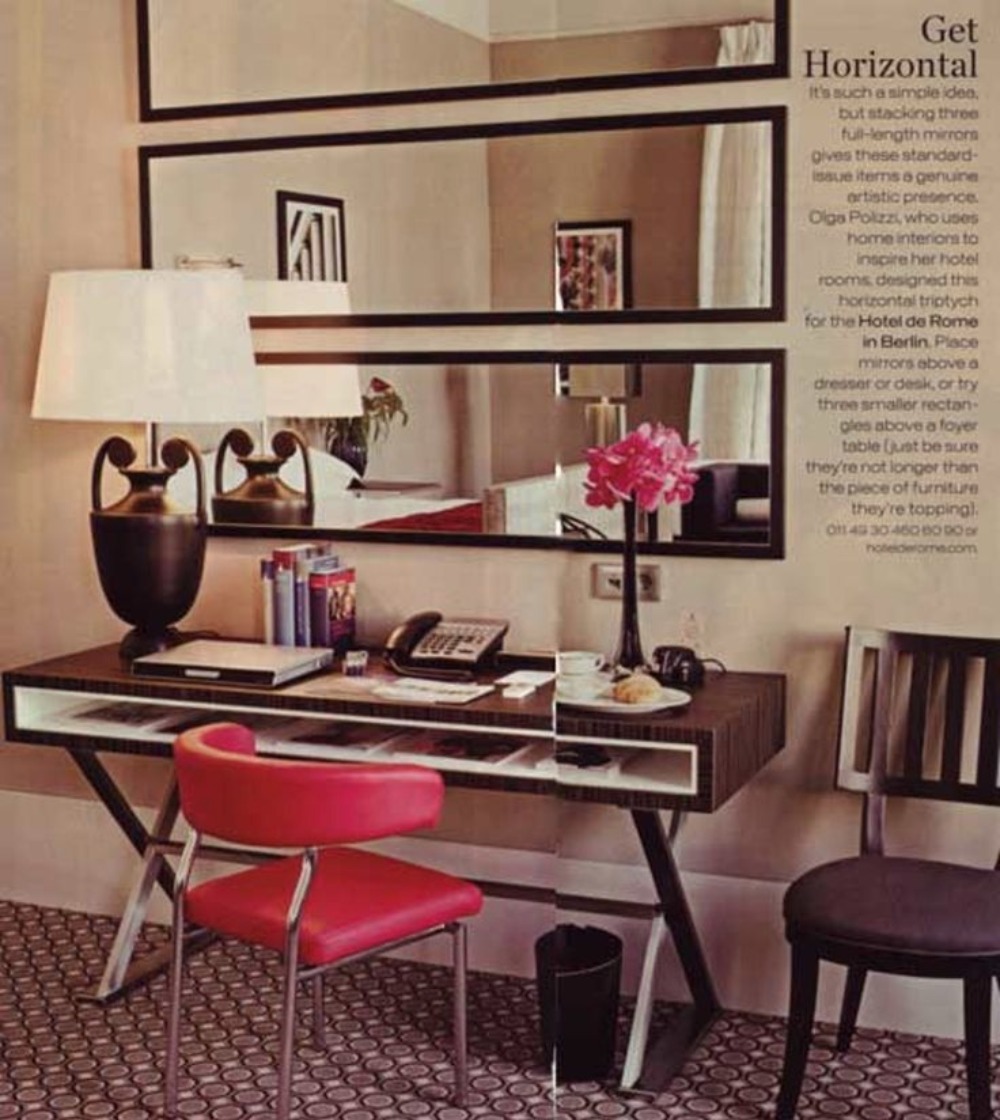
Horizontal Mirrors
Back of door/dorm mirrors - Target (3 at least) $14.99/mirror | Sawtooth picture frame hangers - Walmart (2 per mirror) 6 pack for $1.59 | Flathead nails | Hammer | Level | Tape measure
Step 1:
Most of these dorm mirrors will only come with on hanger on a short end of the mirror. install two of the sawtooth frame hangers on the back along one of the long sides of the mirrors.
Step 2:
Lay mirrors out on the floor and decide how far apart you would like them to hang. once you have the arrangement down. measure the space between each mirror and write it down along with the measurement of the top of the top mirror to the bottom of the bottom mirror.
Step 3:
Using your tape measure and your level measure and mark where the top mirror will go. Install the first mirror. Measure down from the bottom of the top mirror to get your next mirror placement. repeat for the rest of the mirrors.
Found on Apartment Therapy
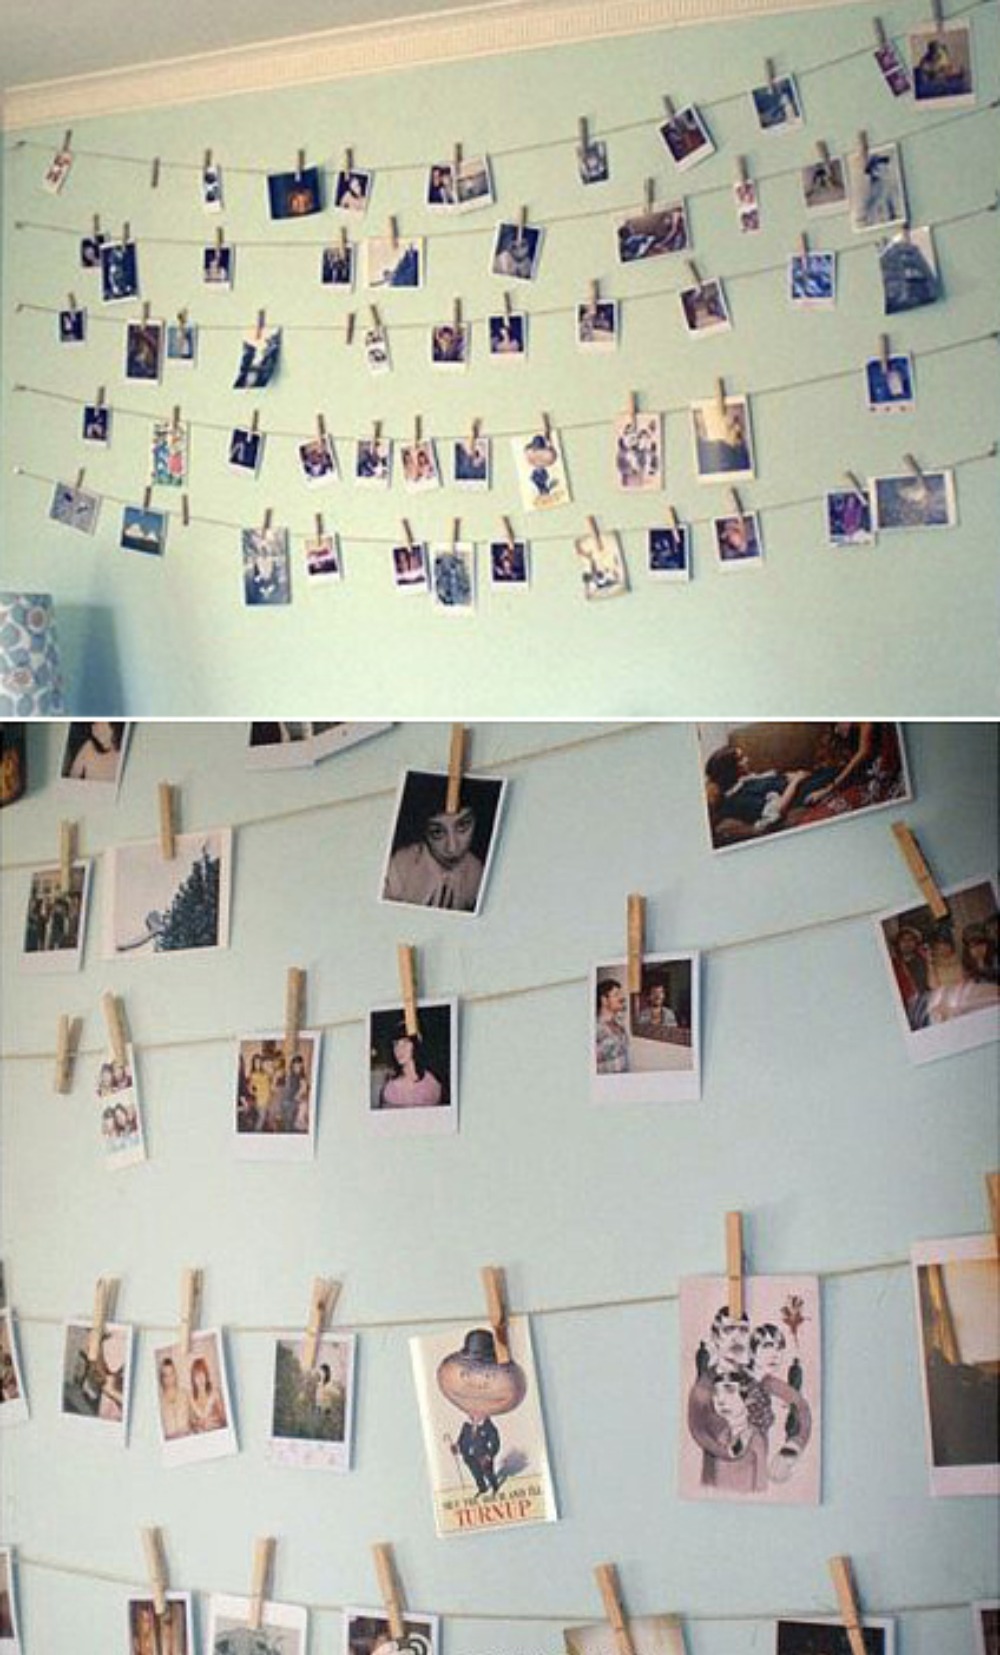
Clothesline Photo Display
Twine - Target 50 yards for $3.50 | Ceiling hooks - Target pack of 36 for $3.79 | Clothes pins - Walmart pack of 32 for $2.27 | Printed photos - Social Prints 24 square prints for $12
Step 1:
you know you want to keep those Instagram shots forever so sift through your feed and find the keepers. Then log onto Social Prints and order them up on some high quality archival paper. (Side note, we LOVE Social Prints and I personally have used these prints the last two years to decorate my Christmas tree)
Step 2:
Measure out where you would like you photo display and screw in the ceiling hooks.
Step 3:
Tie your twine between each set of ceiling hooks to create a “clothes line” between each hook.
Step 4:
Ooooo and Ahhhh over your brand new prints and then put them all on display using your clothes pins!
Photo found on Pinterest
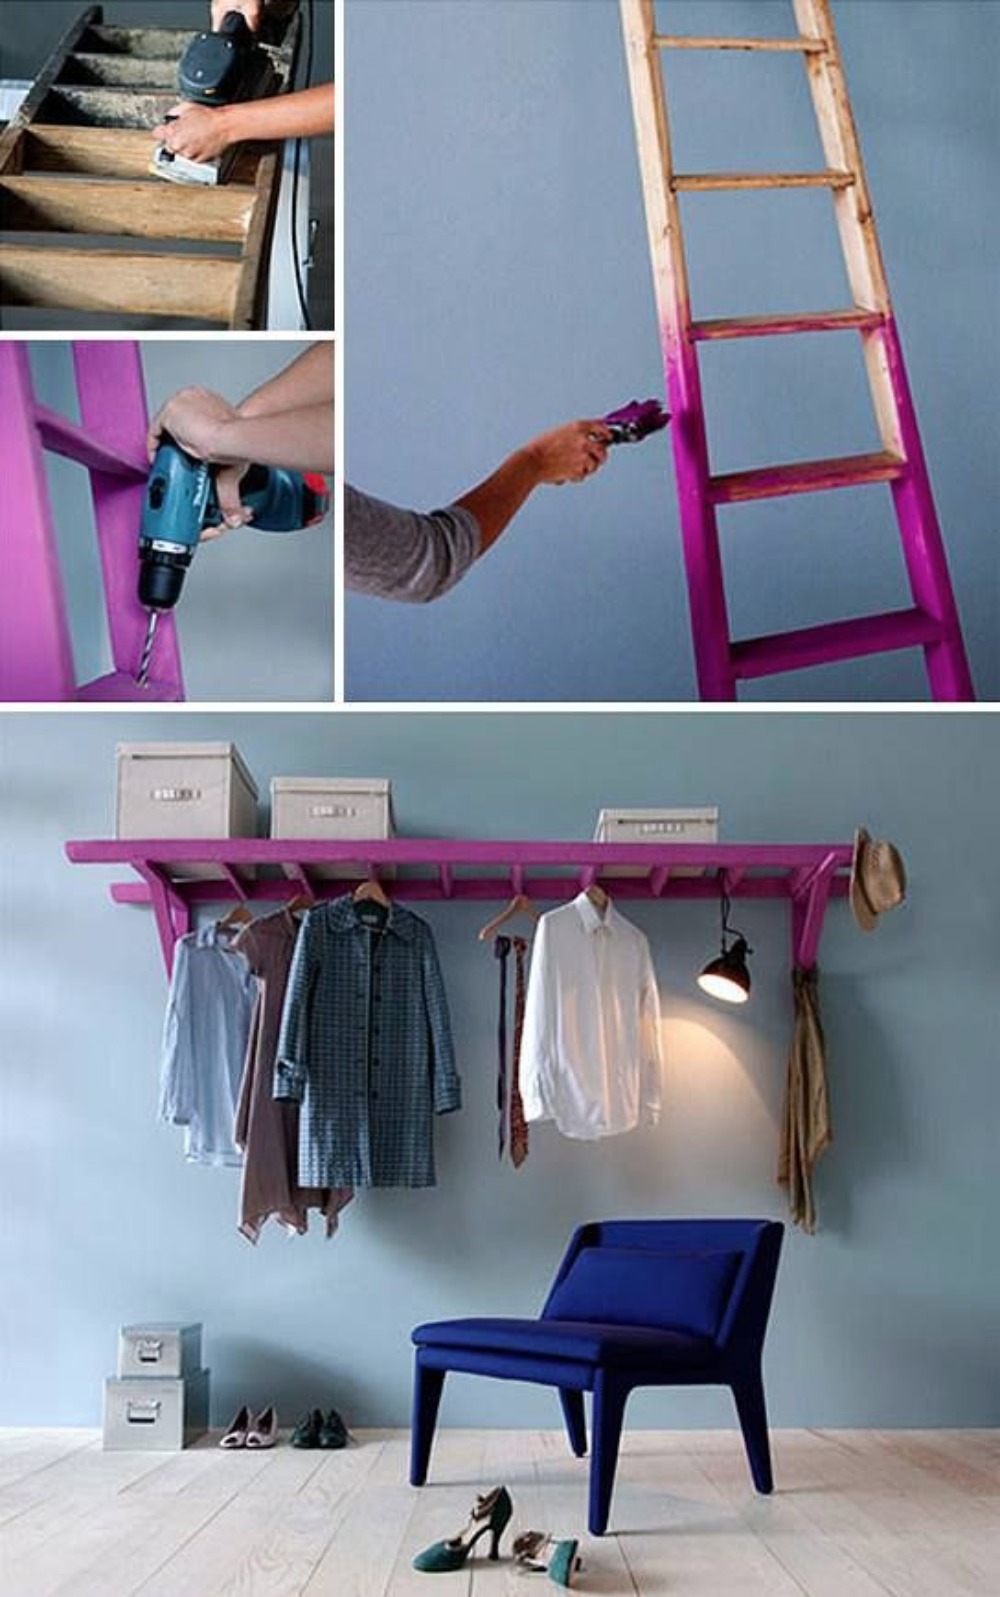
Ladder Shelf
Wooden ladder - we love this one from Home Depot for $145 | Paint - Home Depot 32 oz for $8.46 | Shelf brackets - Home Depot $4.78
Step 1:
Sand down your ladder of choice, our build your ladder of choice (who are we to stop your unbridled creativity)
Step 2:
Paint your newly sanded (or newly built) ladder. Attach your shelf brackets to the outer rungs of your ladder. Be sure they are flush with one side of the ladder so that you can attach them to the wall
Step 3:
Measure out where you would like your ladder to sit on the wall and install your new shelf ladder, be sure it is level! Then step back and admire your handy work.
Found on Pinterest
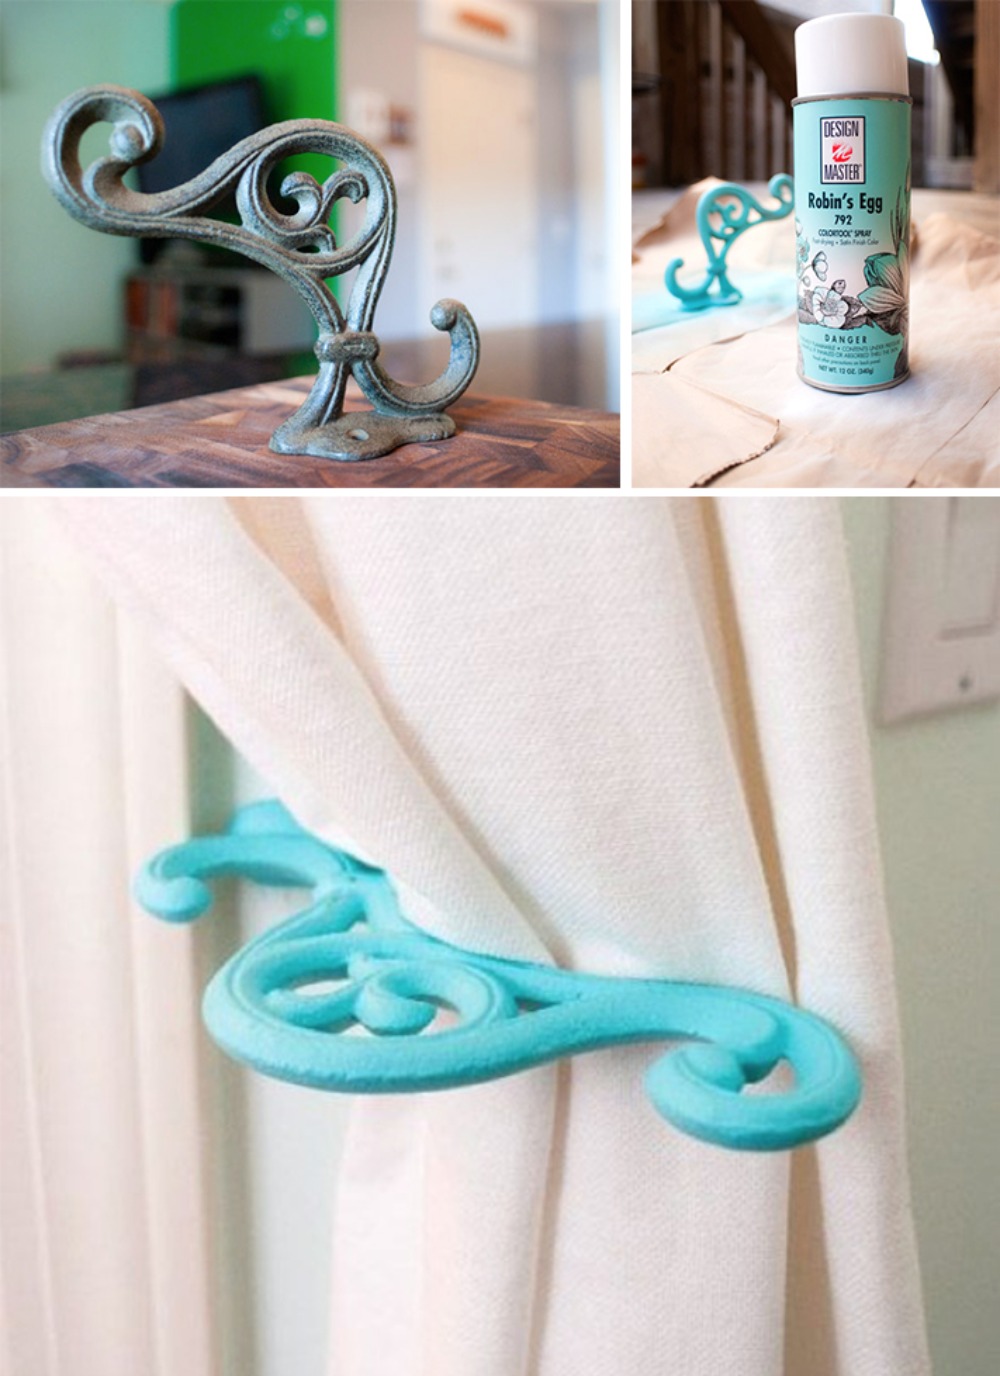
Curtain Hooks
Plant hangers - Home Depot $9.98 | Spray paint - $5.27 | Screws | Drill
Step 1:
Spray paint your plant hangers and let them dry
Step 2:
Once dry using an electric drill and some heavy wood screws attach each hook along the side the widow so that the crook of the two hooks face each other
and out towards the room.
Step 3:
Marvel at the kind of light you can now get in that room now that your window is no longer connately covered by those curtains.
Found on Yellow Brick Home
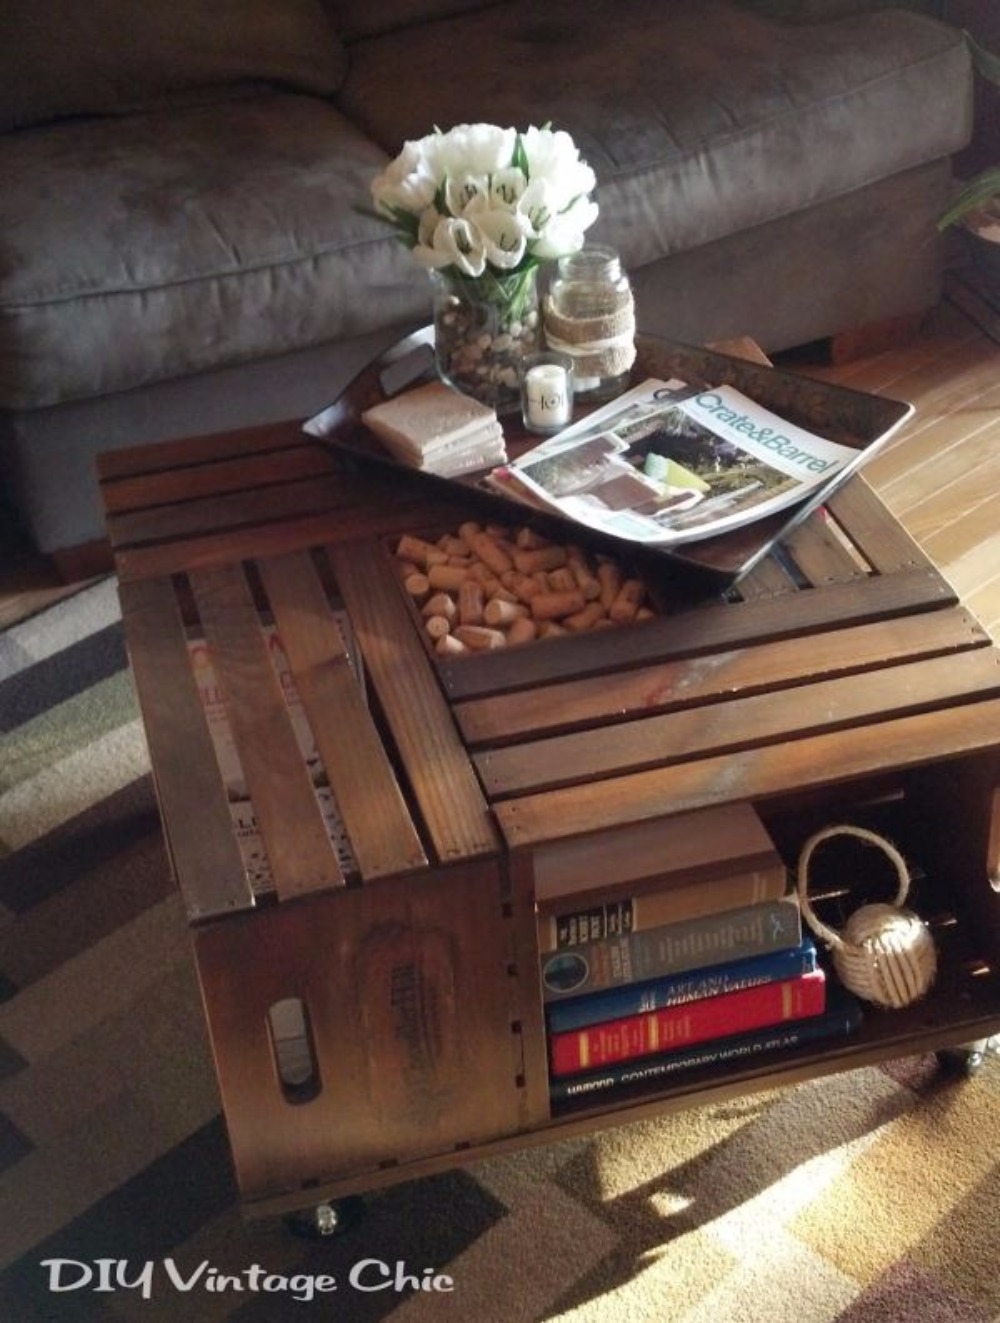
Apple Crate Coffee Table
This awesome little coffee table will have your guests Oooh-ing and Awww-ing. And what is even better, you can find the full tutorial on how to make it on DIY Vintage Chic by clicking right here! Yes that is right. This DIY comes with pictured too! Get to it.
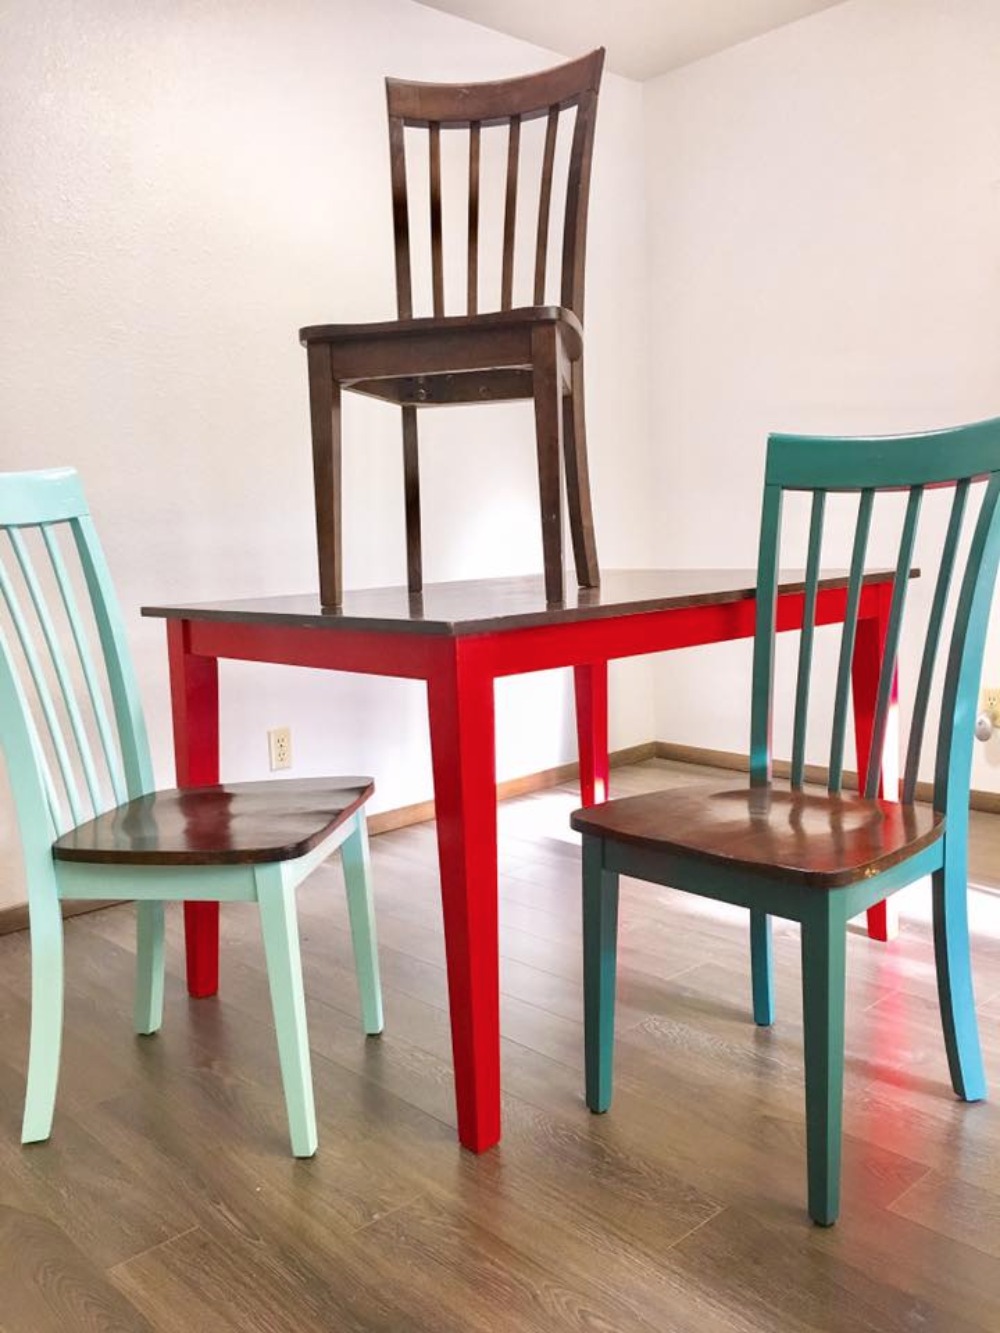
Refinished Dining Set
A dinning set that has been bothering you with how boring it is - on hand already | Paint - Home Depot 32 oz for $8.46 (I went with 3 separate colors cuz I’m crazy that way) | Spray on varnish - Home Depot $7.48 | Sand paper and/or a Hand sander
Step 1:
Disassemble the dining set… if you want to paint just the legs like I did it is best if you can detach said legs from the table top. Same goes for the chairs. (I made sure if there was hardware that went with each piece that they were in separate sandwich bags with labels on the. ( a trick so that you don’t loose anything and you know everything will go back together again once you reassemble them)
Step 2:
Sand away… I hand to spend some back and shoulder breaking hours hand sanding, I recommend getting a sander if theres a lot of surface area to cover
Step 3:
Dust off and wash off your table and chairs and get ready for the best part! Paint!!!! Carefully cover each section and let dry. This might take several rounds as you may not be able to cover each piece entirely with our smudging things. So take your time.
Step 4:
Once the paint is dry and the coats look to be covering each piece fully spray several coats of clear varnish over them. This will also take time. Do not over spray as this will cause dripping.
Step 5:
Reassemble! This is where you will be so very thankful you separated out all those little bits of hardware. This project took me most of the summer and getting around to reassembling after so much time had passed I would have gone insane had I just been looking at a pile of bits and pieces.
Photo credit Julie Pegan