DIY Cake Stands: Easy & Affordable Holiday Table Decor

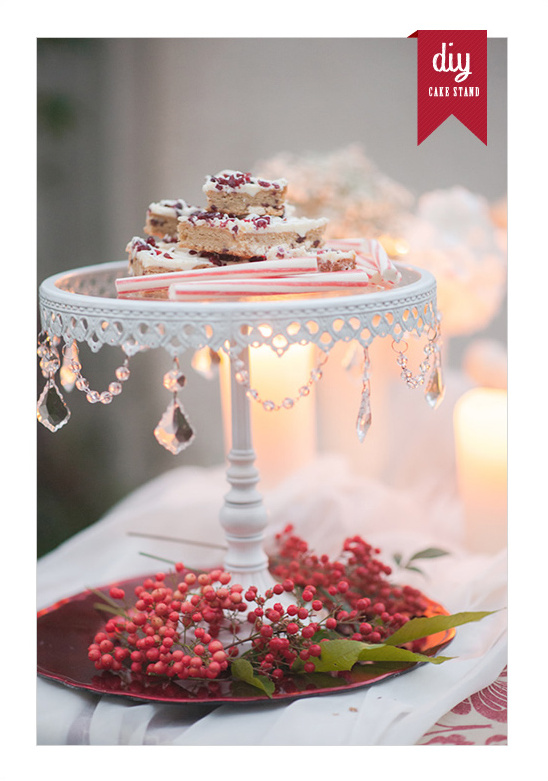
Dana Todd Photography shows us how to make a simple and quick cake stand. A brilliant way to dress up your holiday table without spending a fortune on a cake stand.
This little project only requires 3 supplies and tad of creativity. Combine these things and you too can have your own fancy cake stand. Pick up a few plates, a package of glue and some candle sticks. Dana goes into exact directions and has some great budget ideas on how to fancy up your cakes and cookies.

Read on from Dana Todd Photography On exactly how she made these DIY Cake Stands! Happy Holidays.
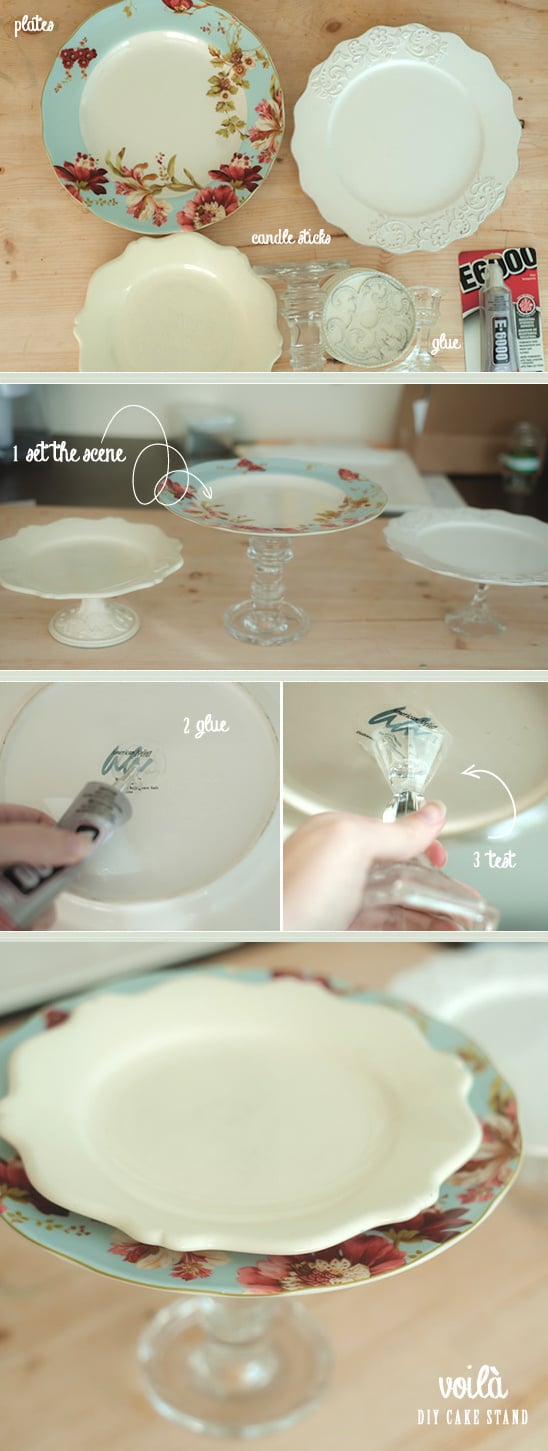
1. Now, for the custom plate stands that I’m about to make… Three plates, various sizes. I found two of mine at the thrift store for $1 each and complimented them with one I found at Home Goods for $2.99. E6000 Glue $3.99-5.99 at your nearest thrift store. I picked up mine for $3.6 with the 40% coupon I had from Michaels Craft store. (this will also make at least 20 cake stands)
2. A candle pillar base, lamp base, or anything sturdy enough on the bottom to hold the weight of what will be on top. Here I will be using three candle pillars I found at the thrift store. The decorative one was a dark rusty metal, so with some paint and a little TLC, I turned it into a base to match my set. A little patience and a little creativity.
3. First and foremost, as I mentioned, make sure the base of the plate holder is sturdy enough to hold the size of your plate. If you use a tiny base with a extra large plate, I can guarantee cake will be all over the floor. Setting up the scene and checking to make sure that I like the bases with the plates.
4. Now for the ‘fun’ part. Make sure your surfaces are clean, and dry. You can use some sand paper to roughen up the center of the plate and the edge of the base that will be attached to the plate, but E6000 is really strong, and in stands I’ve made in the past, I have never sanded the surfaces. Add a little of glue to the edge of the base and the center of the plate. Make sure that you don’t squeeze to hard as you will have an overflow of glue and no where to put it.
5. You can see the strength of the glue here. I can hold it upside down for as long as I want, and it won’t budge! To clean the area, just use a damp paper towel or cloth to clean off the cake stand or the plate after use. DO not put in the dishwasher.
6. You can even go further and dazzle up the edges with attaching jewelry beads or crystals to the edges. For this, you would lightly sand the edges of the plate and hot glue, or super glue the beads to the edge. You can use E6000 however, it will take you a very long time for the drying process. Go even further and add an additional plate! Add some character and fun, and if you don’t glue it down you can always remove the plate for easier access to cleaning or food!
So for about $15 I made 3 custom cake stands, all of which I can use anytime again. Make custom ones for a special theme, holidays or even as gifts!